Tuesday 15 December 2015

Silk Satin dress - Part 1 (the toile)


Tartan wasn't quite tricky enough, so roll on the silk!  Literally.  The stuff won't stop moving.  Any tips for keeping it still?  Is spray starch any good for this?

Before I hack the silk though I'm making a toile out of a polyester silky satin to check that the finished dress will fit.  Thank you Auntie Moira for the lovely fabric!  Do you like what I've done with it?


The bodice
I started by tacking stay tape to the shoulder seams of the front and back pieces (centering the tape over the stitching line of the fabric) and ironing (after tacking) bias vilene tape to the armhole and neck edges of the front and back pieces (this time placing the stitching, which is on the tape, on the stitching line of the fabric).


The bodice is worked by attaching the front bodice to the front bodice lining and the same for the back bodice.  Then you put one inside the other and join the shoulder seams of the dress together and then the same for the lining shoulder seams.  Finish by pressing the shoulder seams open and turning it all right side out.  


The skirt
The skirt is very simple to make; simply sew the front and back pieces together at the side seams and then tack the lining to the skirt by putting it inside the skirt, wrong sides together.

The only difficulty I had is with the fabric stretching slightly as it is cut on the bias.  I'm hoping my silk will be a bit more robust and I'll have to make sure I handle it a bit more carefully.

Attaching the two  
Next was attaching the front pieces of the bodice and skirt.  Again this was very simple and I sewed the seam allowance down (using top stitching) to create a channel which I fed my elastic through.


Finishing the back
The back pieces of the bodice and skirt do not get attached together as there is a nice opening there instead.  I applied a facing to the opening which I turned through to the wrong side and secured.  I then made two rouleau tubes and attached each one to either end of a piece of elastic which I threaded through the channel.


Hemming the dress
I used a rolled hem on my overlocker to finish both the dress and lining hems.  This is the first time I've done a rolled hem and I really like the scalloped effect it creates on this fabric.

And best of all the dress fits well so I can go ahead with making it in silk in time for the Summer.


Cost
ItemSupplierQuantity£
Floral silk satin    My auntie! free 0
White silk satin lining http://www.abakhan.co.uk/silky-satin-1-white-145cm.html 2m @ £4.55 per metre 9.1
Thread http://www.abakhan.co.uk/ 2 @ £1.55 each 3.1
TOTAL 12.2

Tuesday 1 December 2015

Knitting and Stitching Show, Harrogate 2015

'Rose' from http://www.sewladidavintage.com
'Margo' from http://www.sewladidavintage.com
What can I say...I'm £150 lighter!

This year's Knitting and Stitching Show in Harrogate was the best its been for years.  For the first time there was a real dressmaking presence; new exhibitors showed off patterns designed and made in the UK and there was ample variety of quality dressmaking materials from the UK and beyond.

I'm excited to try out two new patterns I bought from Sew La Di Da.


Despite feeling Merchant and Mill's absence greatly (their stall is always full of delights), I did manage to get my hands on one of their patterns from Emma Garry. From another exhibitor I picked up a lovely fine wool for the discounted price of £14 a metre which is very similar to that used on the pattern envelope except it has undertones of dark brown rather than black. 


For the first time at the show I attended a workshop; mine was on how to Crochet a granny square.  I paid £20 and walked away with a complete and slightly/very messy granny square, a full ball of wool and a crochet hook so I can practice practice practice.   

The class was well run despite a leak at the venue which caused the teacher's handouts to disintegrate. One thing that was lacking from the show was any pre-show communication about what supplies would be provided or even if attendees were required to bring anything with them to the workshop in order to fully participate.  So I was quite relieved that my pen and paper was enough and I didn't have to go on a mad dash around the show for some wool in order to be able to complete my granny square!  

The most rewarding part of the workshop was seeing the treble stitches come to life; I recognise them not from books but from the several crochet blankets, aged 30+ years which my grandma made for me and which never leave my bed.   I'd love to be able to progress and make a granny square blanket to pass down through my family (alongside my grandma's ones of course)!

I'd highly recommend the workshops at the show as they add an extra element to the day and allow you to speak with other people who have similar sewing interests.  They're also a great way to try a new method of stitching before committing to buying all of the supplies and, of course, it's almost always easier to learn a new skill first hand from live demonstrations.  

So now I've had an enjoyable two hour taster I've enrolled onto a beginners crochet course in my favourite town of Ramsbottom at Stitch.   It starts in February 2016 and after that I think the granny squares will be under construction!

Stitch Studio
Stitch in Ramsbottom run a wide variety of
dressmaking and sewing courses


This is the aim...!


What else did I get up to at the show?  Well, I spent a lot of time selecting fat quarters for my next sewing adventure...quilting.  

I was given a copy of the book Fast Quilts from Fat Quarters several years ago and I've been wanting to make one of its appealing quilts for some time.  I've finally settled on one which is the size of a double bed and which has a lovely visual symmetry.

I've also collected several patchwork and quilting books over the years so I feel prepared for the new challenge.  So much so that I spent a day of flexi leave from work hand washing and ironing 14 fat quarters and 3 metres of white fabric!  

This is what I'm aiming to make but in a white, purple and green colour scheme (you can see the fabrics I'll be using in the final photograph):


I think, as usual, I've bought and invested in more than enough to last me until way beyond next year's show.  But that's all part of the fun!  I hope everyone else who went found some new and exciting projects to work on!
My purchases from Harrogate 2015


Friday 20 November 2015

Happy housewarming!


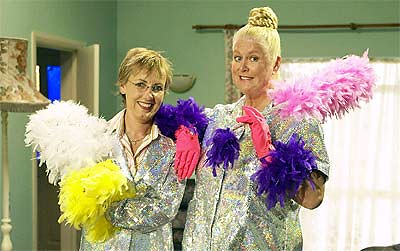
Who remembers these two lovelies?


I had fun recreating something not quite as grand as Kim's gloves as a housewarming present for my friend's boyfriend. No excuses not to be a domesticated goddess now!


To make them, I secured the purple feather trim to the inside of the glove by machine.  I used a zigzag stitch with yellow thread on top and purple in my bobbin.

To finish them off I slip stitched the blue feather trim on the outside of the glove to cover the machine stitching.  I did this using invisible thread which is always a bit tricky to use but I persevered through the feathers.

I'm pretty pleased with them!  Let's hope they get some good use!

Saturday 17 October 2015

Lined curtains - Part 4

They're done!  What have I learnt?  Handmade curtains cost a small fortune, your fingers bleed and they take absolutely ages to make.  But all is forgiven as they look good and (quite importantly) block out light.  I think I deserve a quick project next!


Forming the pleats 
This was a really quick step.  I inverted each cylindrical shape so that I made two pleats of equal depth.  I then secured them at the top from the wrong side before holding the pleat with bulldog clips and finishing them off by securing the pleat at the bottom on the right side.
Finding the centre and securing the top of the pleats from the wrong side
Sexuring the top of the pleats
Completed top pleats


Securing the bottom of the pleats

Training the curtains
I wanted to teach the pleats and curtains to sit nicely so I bought lots of bulldog clips and used three on each pleat.  I then hung the curtains using hooks which I placed so that they covered the small hole at the bottom of each curtain loop.

Curtains in training!
Once they were hung I cut calico into long strips and tied a strip around each curtain at equal intervals (top, bottom and a few in between). Then I went on holiday for a month!

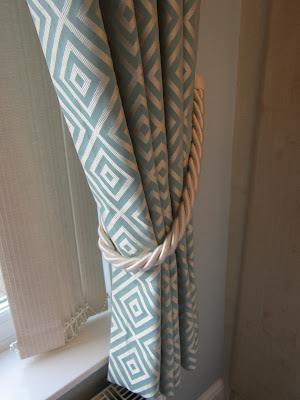
When I came back I removed the calico strips and bulldog clips and the curtains retained their shape very nicely.  I finished them off with some Laura Ashley tie backs and the look is complete!


Cost


Item Supplier Quantity £
Clarke and Clarke Oberon Duck Egg curtain fabric https://www.the-millshop-online.co.uk/ 11m @ £12.50 per metre 137.5
Cotton sateen cream lining https://www.the-millshop-online.co.uk/ 10.5m @ £3.95 per metre 41.48
Curtain weights Class teacher 4 @ £0.50 each 2
Thread http://www.abakhan.co.uk/ 3 @ £1.55 each 4.65
Buckrum, iron on white, 6" http://www.abakhan.co.uk/haberdashery/curtain-making-upholstery-supplies/buckrum-iron-on-white-15cm-6.html 6m @ £1.30 per metre 7.8
Bulldog clips http://www.wilko.com/ 4 packs @ £1 per pack 4
Curtain poles http://www.fashioninteriors.co.uk/rolls-neo-premium-28mm-chrome-effect-metal-curtain-pole-23041r-cfb/p124904.html 2 @ £60.92 each 121.84
Pin on hooks http://www.dunelm.com/product/pack-of-20-pin-on-hooks-1000014939?searchTerm=curtain+hooks 1 0.99
Tie backs  http://www.lauraashley.com/uk/invt/3385264 4 @ £11 each 44
Wall hooks http://www.lauraashley.com/uk/hooks/pair-of-classic-cream-wall-hooks/invt/3266790 2 @ £4.60 each 9.2
TOTAL 373.46

Saturday 6 June 2015

Lined curtains - Part 3

This whole curtain business is no walk in the park.  For starters, how difficult is it to put up a curtain pole?  Or should I say two curtain poles which need to be cut to the same length, placed at the same height and sit level.  Now that was a fun evening.

And why do I make things harder for myself?!  Not one to shy away from new techniques I decided to hand sew my headings which means NO curtain tape.  I'm opting for hand made pinch pleats instead.

This is an example of what pinch pleats look like.  This curtain uses a tripple pleat whereas I'll be using a double pleat.

Buckrum

I started by applying buckrum to the top of the curtain.  To do this I cut the buckrum approximately 8cm wider than the curtain and folded each end under by 4cm.  I then placed the buckrum underneath the lining and sandwiched it on top of the curtain (I had to unpick the curtain side seams a little).  I then adjusted the positioning of the buckrum to make sure the top edge was 200cm from the bottom hem (200cm is the finished length of the curtains).


After pinning the buckrum in place I then folded over the remaining curtain fabric (my 5cm allowance for the top hem) and pinned and tacked this in place (whilst keeping the top of the lining free from any pins).  I mitred the corners of the curtain and then I hemmed the lining by turning it under 1.5cm from the top of the curtain.  I finished the lining off by slip stitching it into place.

This is the top of the curtain, wrong side
Measuring for the pleats

Time for some maths again, and it's a good job I've put the curtain pole up.

I have three things to measure:
  1. width of the curtain pole
  2. the return from the pole to wall
  3. the width of the pleats.

Width of the curtain pole
I started by placing my rings on the pole where I want them to be ie with one ring touching the finial bracket at either end.  I then measured the distance from the attachment holes on each of these rings. The distance was 132.7cm.  This is the distance that my two curtains need to cover.


Return from the pole to the wall
Next I measured the return which is 10cm.  This is the space between the curtain and the wall.  A 'proper' pair of curtains will cover this distance by allowing for some fabric to travel perpendicular from the curtains to the wall.


The width of the pleats
This is dictated by the first two measurements:

  • divide the width of the curtain pole by two (=66.35cm)
  • add on the return (+10cm = 76.35cm).
This is the total width which EACH curtain needs to cover and it will be spread out across the return and the distance left between each pleat.  Ideally though, the curtain will be a little bit wider than this because we should allow for a overlap.  This is an allowance for the curtains to overlap in the middle, otherwise they would only just touch each other when closed and what we actually want is for them to close comfortably without the end ring moving away from the finial towards the bracket.

Next I measured the width of a curtain (=128.5cm wide).  I then calculated the width of the curtain subtract the total width which the curtain needs to cover (128.5cm - 76.35cm = 52.15cm).  This gives me the amount of spare fabric in the curtain with which I can make the pleats.

Typically you allow 10cm for a double pinch pleat and 15cm between each one; so I have enough spare fabric for five double pleats and that leaves an excess of 2.15cm (I will use this to form the overlap).  I will need four gaps between my five pleats (4 x 15cm = 60cm) and this leaves a total of 8.5cm after the last pleat [(66.35cm - 60cm) +2.15cm].  However, only 2.15cm of this is actual overlap and this seems a bit tight to me.  Therefore I allowed 9.8cm for each pleat (9.8cm x 5 = 49cm) so that I have 9.5cm after the last pleat (and therefore an overlap of 3.15cm).


Making the pleats

Now that the hard bit is done, it's on to making the pleats.

  • Mark the pleats and gaps using pins.
  • Start with making the pleat next to the return.  Fold the curtain fabric wrong sides together so that the pins which mark the pleat are in line with one another.  Use bulldog clips to hold the fabric level at the top and transfer one of the pins to the right side of the fabric (remove the other pin).  


  • Fold the buckrum down the length of the fold you just made.  Now tack the layers together near where you will be stitching.  Next, use a set square to draw a stitching line where the pin is.  


  • Using a walking foot, start stitching 5mm down from the top of the curtain and reverse stitch to the top.  Continue to stitch along the stitching line until you reach the end of the buckrum and finish off by reversing.  
  • Remove the tacking and you now have the formations of a pleat. 
  • Repeat the process for all of the pleats.  


View from the wrong side
Now all that's left to do is to pinch the pleats into shape and stitch them into place.  And repeat for the other three curtains.  And hang them up.  To be continued I think...