Thursday 22 March 2012

Make your own bunting!


For the past few weeks I have been responsible for organising a bingo and raffle night at the College of Law in Manchester which is where I spend my days, training to be a solicitor.

I wanted to decorate the room we were using for the event and I thought that bunting would do the trick.  I used 3 different fabrics that I already had and I bought a ½ metre of 4 other patterned fabrics which set me back £9.  Not a bad start on the money side of things. 


I calculated that  double sided triangles using the template I made and the amount of fabric I had would make 12 metres of bunting.  I decided to make a 5 metre length and a 7 metre length using complementary colours.  I bought a 25 metre reel of white bias binding and got to work!

I made the bunting using the method below and I would estimate that it took 2 full days to complete.  This is quite a lengthy process but if you enjoy sewing and making things then time doesn’t seem to matter. 

So for anyone keen to try something new, why not make your own bunting for the Queen’s Jubilee or for a family birthday?  It’s a great way to use up old fabric and experiment with themed colour choices.  Best of all, it's easy to do and perfect for beginners to machine sewing.


Equipment:
·         Selection of fabrics;
·         Triangle template;
·         Tailors chalk;
·         Pinking shears;
·         Sewing machine and thread; and
·         Bias binding in colour and width of your choice (length depends on how much bunting you want to make).


Method:

Step 1:  Make a template.  I used Microsoft word and inserted a triangle from their range of shapes into a document.  The triangle I used measured 20cm wide x 25cm height.   I then printed it and cut it out for use as a template.  If you want a slightly stronger template then simply stick the paper template to thick card and cut out the shape from the card.

Step 2:  Place your template in the left hand corner of your fabric.  Using tailors chalk draw around the template.  Then flip the template over and position it so that the tip of the template is in line with the base of the first triangle drawn.


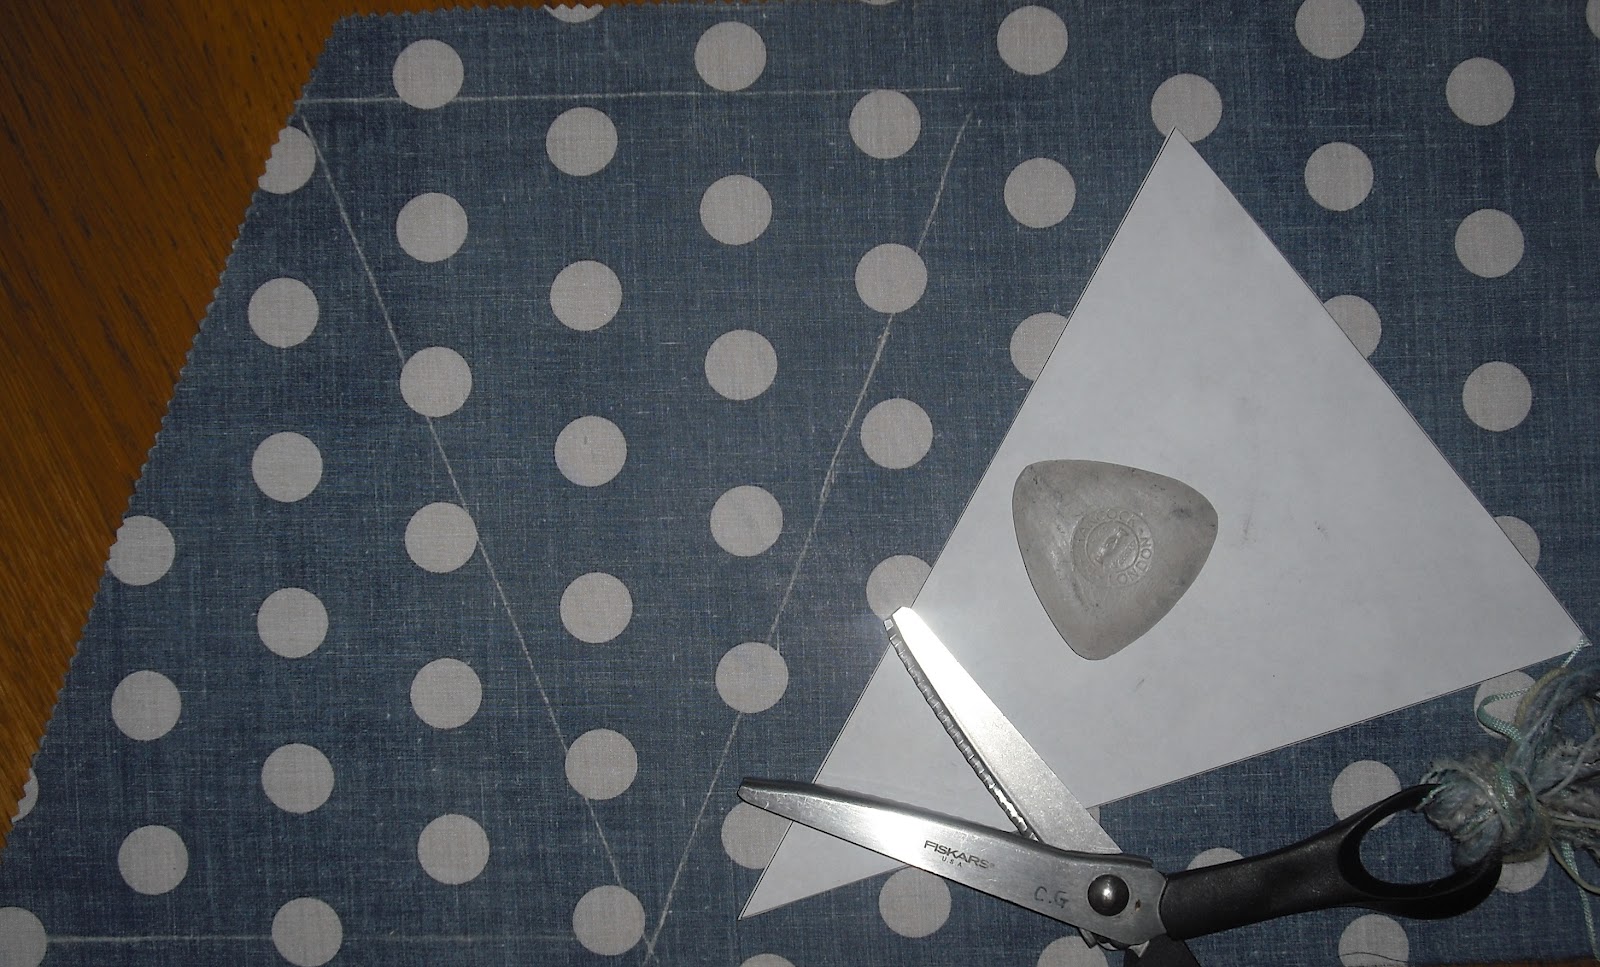
Step 3:  From ½ metre of fabric I could draw out 18 triangles in 2 rows of 9.  Once you have drawn all of your triangles cut them out using pinking shears (to prevent fraying).

Step 4:  Pin 2 triangles together, right sides facing in, and position the material under the foot of the sewing machine with the needle on the right of the base with the tip of the triangle pointing in your direction.  Sew with straight stitch using the foot of the machine as your seam allowance guide.  When you reach the tip of the triangle, with the needle in the fabric, lift the foot and rotate the triangle 180 degrees anti-clockwise.  Now sew down the other side of the triangle.  Repeat for all of your triangles.


Step 5:  To turn the triangles the right way out first snip the tip of the triangle off being sure to cut as close to the stitching as possible without actually cutting the stitches.  Then trim the seam allowance down on both edges near the tip to reduce the bulk of fabric.


Step 6:  Keep your finger positioned on the blunt tip and use you other hand to turn the triangle inside out.  To make the point more defined roll the tip of the triangle in your hands and wiggle the 2 layers of fabric to try and ease it out.  This will work but may take some time.  Do this for all triangles.

Step 7:  Press all triangles and trim off any seam which is on show at the base of the triangle as a result of turning inside out.

Step 8:  Take your bias binding, measure 30cm in and make a mark at this point.  Fold the bias binding in half horizontally, pinning where necessary but only up to the 30cm mark.  Now sew the bias binding in half horizontally using a straight stitch, from the beginning of the bias binding up to the mark.  When you reach the mark, stop sewing. 

Step 9:  Place a triangle in between the folded layers of bias binding at the mark and pin in place.  Now continue to sew until approx 5cm from the end of the base of the triangle.  Repeat this step until you have sewn all triangles into place. 


Step 10:  Continue to sew bias binding in half for a further 30cm (to match the beginning of your bunting).  The ends of the bunting are to help you pin the bunting up.  You could leave them as they are or sew the end back on itself with a few tacking stitches to create a loop. 


Thursday 15 March 2012

English Rose - Part 2


I’ve been busy working on my English Rose dress today and I am happy with the way the zip has turned out.  Instead of tacking the back opening together and pushing the teeth of the zip through the gap (as it said to do on the instructions) I followed my tutors advice and tacked each side of the zip to the back opening making sure the teeth lined up with the edge of the fabric.  The result is the teeth of the zip are perfectly covered by the fabric.  The stitching is nice and straight because I could move the zipper up/down whilst sewing so that the stitches did not have to curve around the zipper (which they would have done if I followed the instructions as the zipper would have been stuck in one place). 


To complete the back section of the dress I tacked and sewn 2 godets into place.  I’m really happy with how professional these ones look after having built up my confidence on the front godets.  So now it was time for the straightforward task of sewing the front and back pieces together and ta-dah...no longer lots of odd pieces, but 1 garment!  A further 2 godets were sewn into place on the side seams to complete the fullness of the skirt (which is very, very full)! 


After trying the dress on, it is a little big on the top half so it’s going to need taking in a little.  I’m not an expert on this so I’m going to wait until my class next Thursday for my tutor’s help.  But for now it's off to Lancaster!

Sunday 4 March 2012

I do like a fabric shop...

This weekend I visited Leon’s Fabric Superstore (http://www.leonsfabrics.co.uk/) on a recommendation from a woman at my evening class.  Armed with my Google maps directions I set off in the direction of Chorlton and found the store quite easily, only a short distance out from Manchester City centre.  When I got inside I thought to myself what a true Aladdin’s cave it was...floor to ceiling there is every type of fabric you could want!  Despite the impressive range of carnival and wool fabrics that were tempting me, I managed to stay on the straight and narrow and look for what I went in for!

I had recently joined a trial subscription of Sew Today magazine (http://sewtoday.co.uk/) and fell in love with several of the patterns from February’s (2012) issue.  The patterns are half price when you’re a member so I went a bit mad and bought four.  When they arrived I was quite surprised they were the patterns I had ordered as the pictures on the front of some of them look very old fashioned! 

This is the cover image on V8727 and opposite
is how Sew Today showed the pattern
in February's issue

Nevertheless I found some lovely fabric at Leon’s for two of my dresses.  The first is a lovely lace for McCalls M6505 and the second is a duchess satin for McCalls M6508.  If you live in the Manchester area (Birmingham also has a Leon’s store) I would highly recommend a visit to Leon’s as they have a wider variety of fabrics than Abakhan and the staff are wonderfully helpful.


Next week I am taking a rest from day to day goings on and venturing further north for a reunion with my University house mates.  I have been looking forward to it for a few weeks now, not just to catch up with my friends (it’s been 9 months since we all graduated from Lancaster University), but also for the fabric shops! 


Hidden away in a quiet part of the City is a Liberty of London factory shop where they print the fabrics ready for transporting to the capital.  I discovered the factory shop when my University time was drawing to a close but I never actually got to go in.  From memory this was due to the shop shutting quite early on the weekend so this time I am prepared for the early morning spee!  I will be going armed with pattern V8727 (pictured above) to try and find a printed silk charmeuse.

I also plan on visiting the fabric shop where I bought the ‘English Rose’ dress fabric.  No doubt there will be lots of other gorgeous prints to tempt me.

There will be plenty of pictures to follow of my Lancaster trip and the Liberty shop so watch this space!

English Rose - Part 1


Well since Valentine’s Day I have been busy doing non-craft related things including sitting several painstakingly long exams.  Now though, it’s back to sewing and I have been busy today on my latest project, which is my very first handmade dress.

About a year ago whilst walking through Lancaster I came across a gorgeous little fabric shop and completely fell in love with the dress in the window.  Not being one to shy away from new things, I asked the shop owner to help me pick out the right amount of a gorgeous cream cotton with blue roses with the plan of making it for myself.  However, when I looked closely at the pattern I thought that it might be a little too complicated to ‘give it a go’ and so I enrolled on a dressmaking course near my home which I attend weekly...

...and thank god I did!  There is definitely a lot of skill in dressmaking and my tutor is a fantastically skilled and admirable woman (she makes all her own clothes and costumes for the Bolton Octagon Theatre).  I also make good use of the over locker which of course I would not have at home (although my birthday is coming up, so maybe something worth dropping a few hints over!)

So, onto my progress...I have just sewn the godets into place on the front piece.  This was quite tricky for a novice because I felt like I might accidentally sew the godet in half!  Despite my worrying they look quite good now they are in place and the next step is to get the zip into place on the back section.


I am going to update the blog from now on with the progress of the dress; for myself it will be a diary of my progress and I will offer all the little tips I learn along the way.  Hopefully it will be an interesting read!
The tip I picked up is to sew down one side first and then up the other side so that both lines of stitching meet at the tailors tack (red cross in my pic).


P.S. For anyone living in Manchester next to the Abakhan store is a shop let by dressmaker Danielle Ferguson.  Her work is lovely and her blog is worth checking out at t http://danielleferguson1986.blogspot.com/